
Tomcat & Fatcat Wall Fixing Kit Install
Units come complete with an installation pack that contains the following:
3 Feet
3 Feet Screws
1 Fixing Block
2 Fixing Screws
2 Fixing Plugs
1 Connecting Bolt
1 Washer
1 Drill Bit
3 Neoprene Spacers
1 Hex Key
You'll need a step ladder, large & medium crosshead screwdrivers, pencil & a drill to install your Hicat® noting that units can weigh up to 50kg so you may need an extra pair of hands to install your Hicat® - if you have a stud/joist sensor this will also be useful & if fixing into masonry you may need a specialist drill bit
Please note if you’ve ordered a Wall Fixing Kit from our online shop it will not include feet or neoprene spacers as these are only included with install kits for new units
After unpacking your Hicat® give the unit a good vacuum inside & out to remove any loose fibres

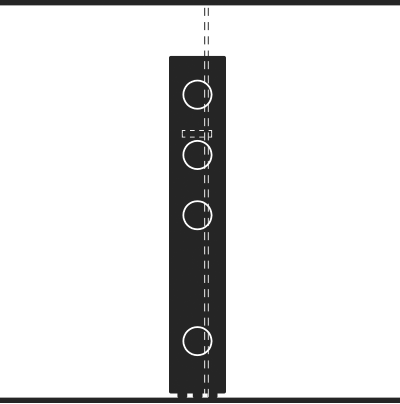
Attach the feet screwing them into the pilot holes on base of the Hicat®
NB if installing a SixToo™ as a wall mounted unit without ballast it’s best just to use 3 feet rather than six as the unit may be easier to plumb level with the aid of the neoprene spacers

Remove cat

Install the Wall Fixing Kit to the wall towards the top of the Hicat® making sure you've avoided obstructions & the internal shelves & features of the unit don't interfere with the proposed positioning
NB also remember that if you are fitting a Hicatch toy that you will need to factor this in to the positioning of the Wall Fixing Kit
The supplied Fixing Plugs are universal & suitable for fixing into plasterboard, timber or masonry - installing into plasterboard will give a secure fixing & you can also secure through plasterboard into a stud or joist

Remove cat
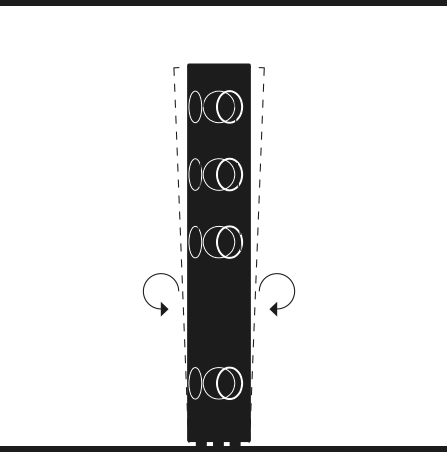
Rotate the Hicat® so the access holes are facing in the desired direction making sure the unit is plumb - if you have an uneven floor you can use the enclosed neoprene spacers to level out the unit where required
Tip - it’s best to just slide a spacer under the feet to start with to get the unit level then once you’re happy with the rotation & setting out, unscrew the feet, add the spacer & re-attached the feet

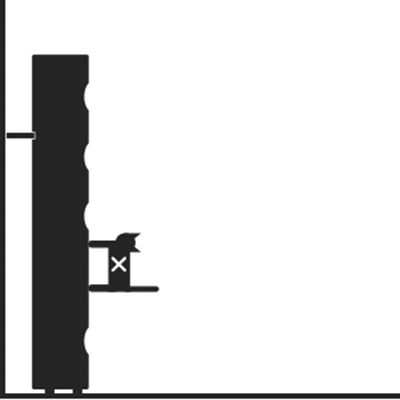
Place Wall Fixing Block against the Hicat® at the required height & rotation then mark its position on the unit with some masking tape

Use the drill bit to make a hole in the unit to connect the Wall Fixing Block to the Hicat® - it’s best to make the hole between the ribs of the carpet & be very careful not to snag & pull the strands when drilling as this can badly ladder the carpet
Tip - making a small cut across the spot where you are drilling to cut strands will help stop the strands snagging & pulling

After drilling the hole release the drill bit leaving it in the hole & use it to guide the connecting screw through the hole from inside the Hicat®

Attach the Wall Fixing Block by connecting bolt from inside the Hicat® making sure that the washer is fitted between the bolt & the inside surface of the unit - tighten the bolt just enough so that the block can still be tilted up & down slightly when set against the wall

Remove cat

Move the Hicat® into it's proposed position & mark-up along the top edge of the fixing block whilst it’s tilted so that back edge of the block is flush to the wall

Unscrew the fixing bracket & use this as a guide to mark up the fixing holes

Drill the fixing holes with the large bit at least 50mm deep then install the fixing plugs making sure they are fully inserted & flush with the wall

Screw the fixing bracket on to the wall with the fixing plate face-up

Screw the Wall Fixing Block to the bracket then then re-attach the Hicat® again making that the washer is fitted between the bolt & the inside surface of the unit - do not over-tighten the bolt remembering that the bolt is only there to stop the unit from toppling

If the Wall Fixing Block pulls the Hicat® out of alignment making it unstable it’s best to uninstall the unit then open up the connecting hole slightly so the bolt locates freely into the Wall Fixing Block when it’s fixed flush to the wall
Remove cat

Remember to give your Hicat® a quick check over from time-to-time to make sure that the fixing block is secure & the unit is stable before allowing your cat to play on it

Playtime…
We love hearing from customers & their cats on what they think of their Hicat® so feel free to get in touch & send a piccie or two