
Polecat Wall Fixing Kit Install
Units come complete with an installation pack that contains the following:
3 Feet
3 Feet Screws
1 Connecting Rod (plus washer)
1 Fixing Block
2 Fixing Screws
2 Fixing Plugs
3 Foam Discs
1 Drill Bit
1 Hex Key
You'll need a step ladder, large & medium crosshead screwdrivers, pencil & a drill noting that you may need an extra pair of hands to install your Hicat® - if you have a stud/joist sensor this will also be useful & if fixing into masonry you may need a specialist drill bit
After unpacking your Hicat® give the unit a good vacuum to remove any loose fibres

Attach the feet by screwing them into the pilot holes on base of the Hicat®

Remove the transit screw from the back seam of the Hicat® using the Hex Key
Remove cat

Attach the fixing block to the Hicat® by removing the fixing bracket & connecting the bolt into the unit with washer attached - make sure that the fixing plate is facing up when installed & tighten the bolt just enough so that the block can still be tilted up & down slightly when set against the wall

The supplied Fixing Plugs are universal & suitable for fixing into plasterboard, timber or masonry - installing into plasterboard will give a secure fixing & you can also secure through plasterboard into a stud or joist
Remove cat

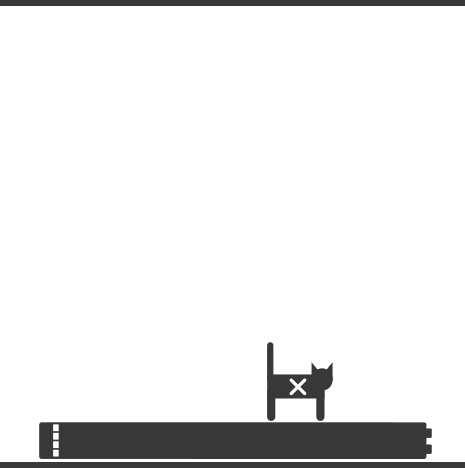
Move the Hicat® into its proposed position & mark-up along the top edge of the fixing block

Make sure the Hicat® is plumb, that all feet are in full contact with the floor to stop any movement & the fixing block is flush against the wall before marking up

Remove cat

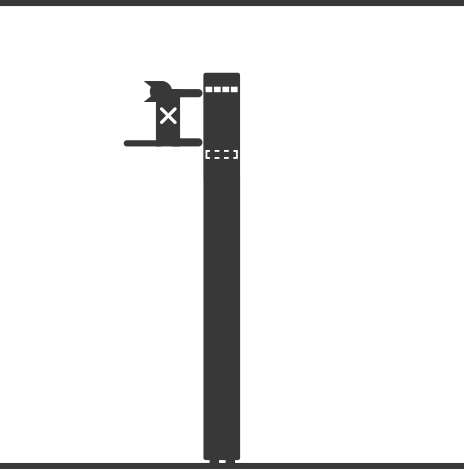
Unscrew the fixing bracket & use this as a guide to mark up the fixing holes

Drill the fixing holes with the bit at least 50mm deep then install the fixing plugs making sure they are fully inserted & flush with the wall

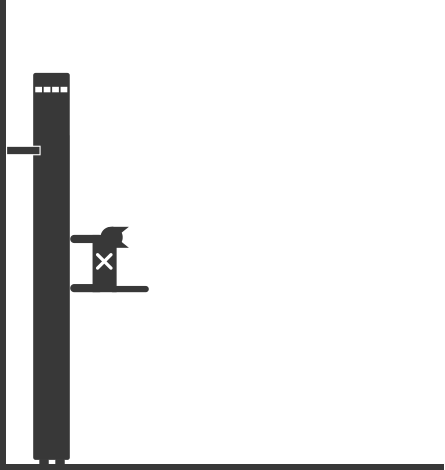
Screw the fixing bracket on to the wall with the fixing plate face-up

Remove cat

Re-attach the Hicat® to the fixing plate

If your Hicat® is installed on a hard smooth floor & moves during boisterous play uninstall the unit & stick the foam discs onto the feet to stop any unwanted movement - it’s important that the unit is lifted into position after the foam pads have been stuck onto the feet as sliding the unit will cause the pads to ruck & remember that all three feet need to be in full contact with the floor to stop the unit from spinning or moving

Remember to give your Hicat® a quick check over from time-to-time to make sure that the fixing block is secure & the unit is stable before allowing your cat to play on it
Playtime…
We love hearing from customers & their cats on what they think of their Hicat® so feel free to get in touch & send a piccie or two